Builders & Their Stories
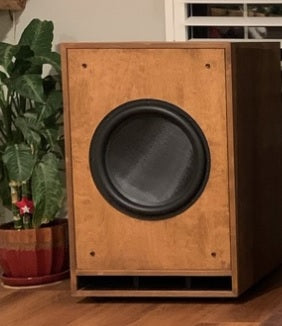
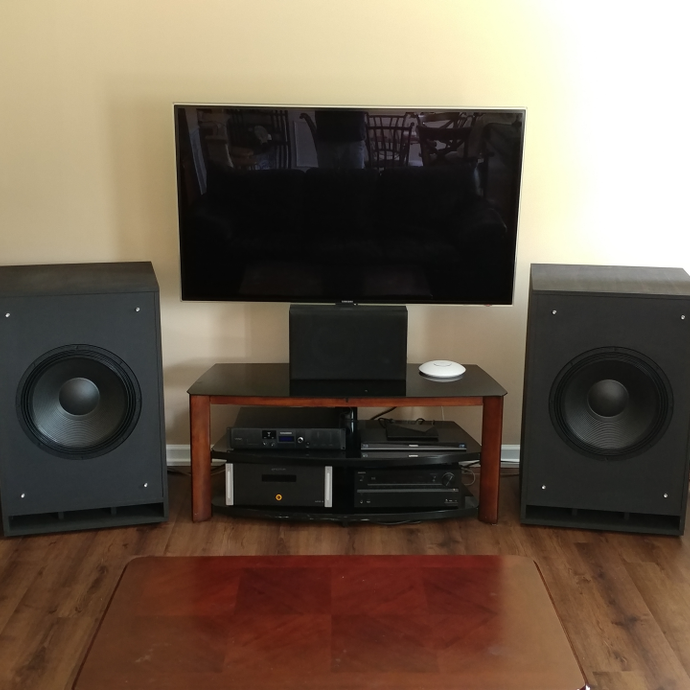
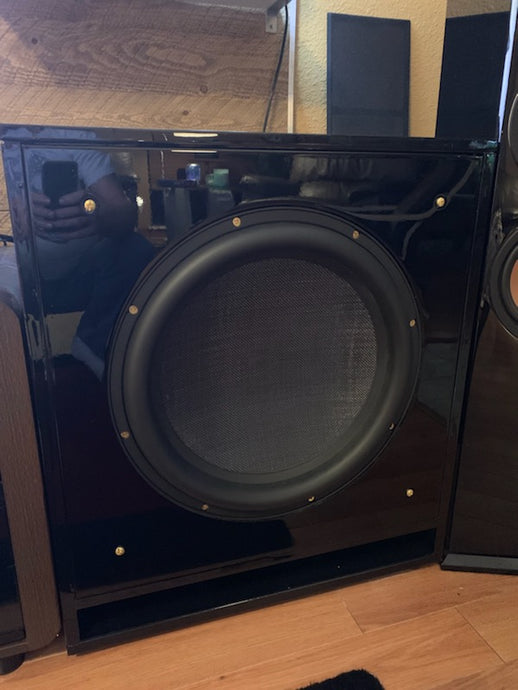
Dual 21" Full Marty by Christ T.
“It all sounds fantastic and they dig really deep.”
First impressions were that all the pieces were cut very accurately. There are a lot of parts so I laid them out and printed out the instructions from the site. Make sure you’ve got A LOT of glue. Used about a half a gallon during assembly.
Assembly was about a 2/10 on the difficulty scale. Tolerances were perfect, not too tight, just loose enough for all the parts to fit together snugly with no slop. Honestly it was really basic and straightforward to follow the instructions and assemble the parts in sequence. The only thing I did differently than the order in the instructions was when it came to assembling the back and port. I dry fitted the parts in this step and found it very tough to see myself painting it from the front and back without causing drips and getting even coverage. So instead I attached the port braces to the bottom and painted all the surfaces before assembly.
Everything was per the instructions and very easy honestly.
I covered both cabinets in Duratex after filling and sanding all the holes and a light sanding/scuffing some of the seams and the entire surface for good adhesion. Duratex is a really easy solution and works very well on MDF, have used it countless times on other projects so this was a nice easy solution.
I could have left it at that but I don’t have a dedicated theater room, kids, dog, wife, life……. So this created two concerns for me, first and most obvious is damage to the drivers. Second and more important is the wife did not really care for the “car audio” look of the driver showing. So grills were the obvious solution.
TIP: If making a baffle, use a ½” round over bit on the outer AND inner edges. It’s very important to do the inner edge too or the grill cloth material will show the inner edge when you wrap the frame.
I painted the frames and hardware black and wrapped them in speaker grill cloth.
TIP: I prefer to use a finish nailer for assembly when I work with MDF. Really speeds up the process (still need to clamp parts together tightly, but after nailing you can remove clamps and parts will not shift while glue sets). Be forewarned though, taking this route will increase your prep time prior to painting/coating your cabinets due to filling and sanding all the holes from the nailer.
Both Subs have their own NX3000D bridged powering them (fairly underpowered I would say) and they perform fantastically. They take everything the amps have and pretty much laugh it off. It took a little testing and tuning with REW, the amps and AudysseyXT32 but it all sounds fantastic and they dig really deep. HPF @ about 15.5 HZ and a little PEQ boost to fix nulls for my room and that was it!
This pair replaced some older basic SVS PB12-NSD’s.
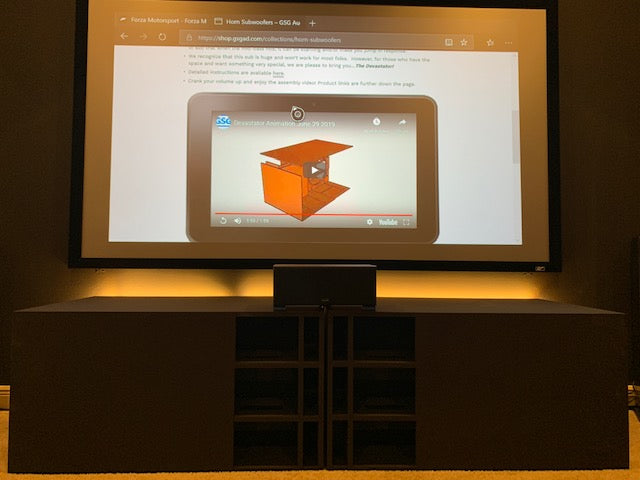
21" Devastator & Dual 21" BTS by Mike P.
“The Devastator was an eye-opening addition for me. The first time I heard the 50 caliber gunshots from the film “The Accountant”, I was floored…and hooked.”
I’m a newcomer to DIY audio but enjoy woodworking and the satisfaction of completing DIY projects on almost anything. As a lifelong fan of home theater and audio (I installed my first projector and 120” screen setup in 1986!), DIY audio was a natural fit.
My current setup is problematic for both home theater and, particularly, LFE audio reproduction. The space I have to work with is an “open-concept” design room with a large kitchen and dining room open to a 24 x 20 foot family-style room. The entire area is about 9,000 cubic feet and very hard to fill with the chest slamming bass I was looking for.
I was using three M&K MX-150THX subs but needed more. In my search for more I discovered GSG Audio and the mighty 21” Devastator. Fortunately, GSG is less than 10 miles from my home and a quick call to GSG started me on my journey. Kevin was incredibly helpful and led me through everything I would need to complete the build. I picked up the flatpack and downloaded the instructions from the GSG website and it wasn’t long before I was incorporating a monster sub in my room. The build went super smooth with the numbered panels and clear instructions manual.
The Devastator was an eye-opening addition for me. The first time I heard the 50 caliber gunshots from the film “The Accountant”, I was floored…and hooked. My next order was for a pair of 21” BTS (behind the screen) flatpacks. As before, GSG was a great help, and it wasn’t long before I was rockin’ three 21” monsters.
I now have the Devastator in the front left corner behind a red grill and the two BTS subs disguised as sofa tables behind each section of a large L-shaped sectional. The sonic results are flat-out incredible and the visceral punch from the addition of the BTS near-fields is hard to describe. My movie watching experience has been changed forever.
I have to thank the group at GSG for producing an outstanding product that is affordable and so much fun to build. If you haven’t done it yet, give GSG a call and get started on your DIY journey to LFE nirvana.
Dual Mini Martys by Mike S.
I started off being unsatisfied with my dual 12 subs and their lack of low end. I then went on to spend countless hours researching and looking for the best performance within my budget. GSG kept popping up over and over in my searches and I got to thinking that DIY with GSG, might be an option for me. I was still in the exploration stage though, so I reached out to a few other subwoofer companies via email and phone. GSG was the only company that responded to my emails and answered my call, and that said a lot.
My call with GSG was great and they really helped me out. GSG spent a considerable amount of time asking questions about my listening style, budget, goals, and room size. This is what customer service should be! I was well informed to make a decision to buy a sub enclosure that I would be building and customizing, along with a pair of drivers.
After ordering I had some time on my hands to prepare and tinker with ideas. Kevin reached out and made me aware of the GSG customer group on Facebook (just search for GSG Audio, under the Groups tab on Facebook). This is the best support group out there since everyone wants to see you succeed and offers up plenty of helpful ideas and suggestions. To everyone in that group, I’d like to say thanks!
Final thoughts……this was a very enjoyable journey and the end result is a pair of great looking and sounding subs that I’m proud of. Now I have my eyes on a Devastator for my next adventure, which I definitely don’t need, but still want : )
Dual Mini-Martys by Nik C.
My wife and I built a home 4 years ago and added a 16 x 22 x 10 dedicated Home Theater room. Well after living here for 4 years we finally decided to go for it.
I am so glad I found out about GSG on YouTube. I came across a channel called Home Theater Fanatics and thought man this would be a fun project to build my own subs. I was looking at the SVS PB 16 Ultras but for the price and performance I think I chose right going with the Mini Marty Round Over 18” flatpacks and there is something special in knowing you built them.
I am not even dialed in yet with REW and DSP but after watching a few movies over the holiday break, I got to see what an awesome upgrade the new Mini Marty’s were compared to my two Klipsch 12 inch subs. They are hitting very low and sound so clean. The GSG customer service has been top notch and I have never seen any shipment of anything I have ordered packed so well.

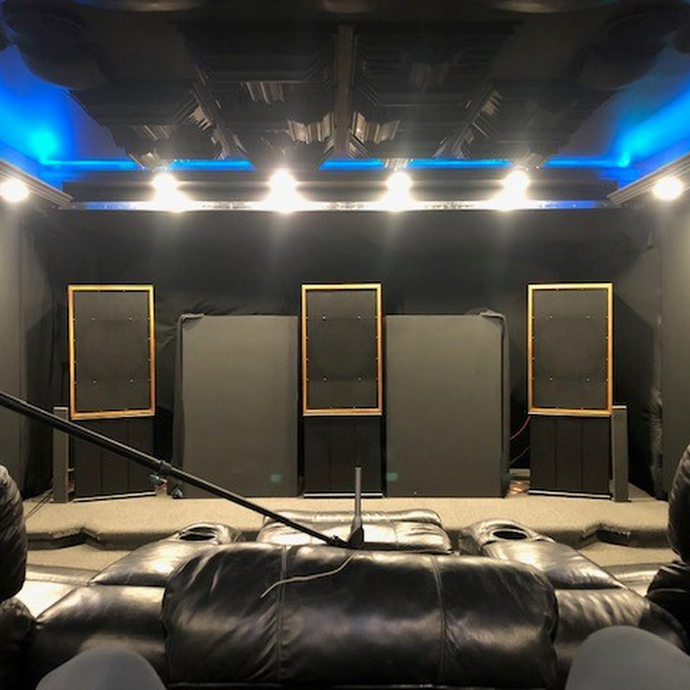
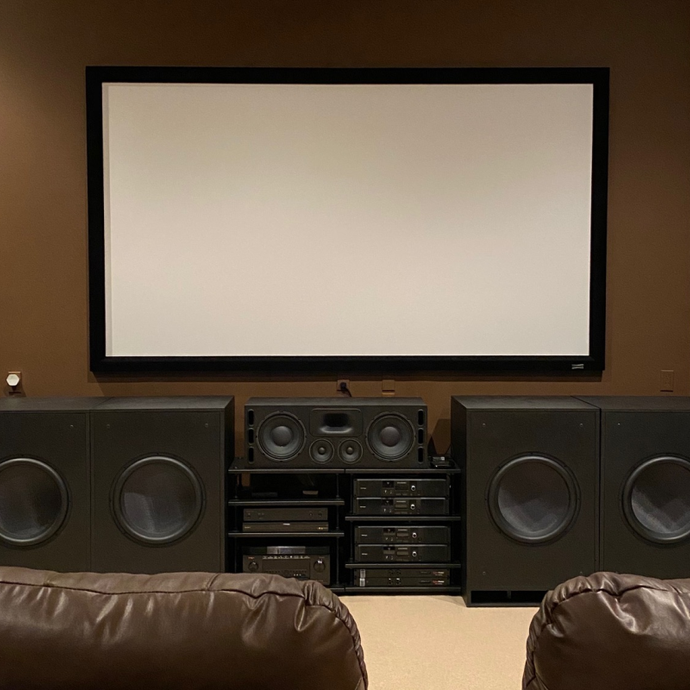
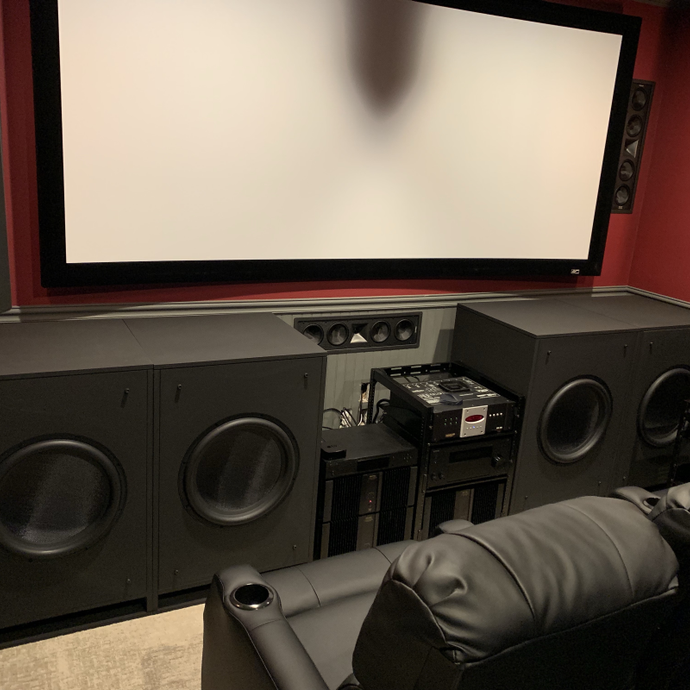
4 X Cubes & MBMs by Mark D.
I'm the guy who doesn't like to compromise. No compromise audio is expensive, so you either have to pay or you have to find a way to do it yourself. As my theater has grown (I listen to 2-channel in here as well) so has my idea of what zero compromise audio actually is. A lot of this is due to a man named Scott Evans who is not only a good friend of mine but is a true audio professional as well. Scott is the one that has shown me the difference of what good audio actually is and that has led me to my current theater setup.
My setup is not conventional. To keep it short, I'm using 36 channels of amplification with dsp per channel to do all of the speaker crossover, time alignment, eq, room correction, limiting, filtering, etc. In fact we are not using bass management in this room. All speakers are active (meaning each driver has its own amplifier channel) with the exception of the Atmos speakers and all speakers are set to large. The left surround and left Atmos bass is fed to the left stereo subwoofers via Dante' audio over ethernet and the same on the right side. The center 4 subwoofers are strictly LFE channel only (ok I lied, the center channel uses bass management to the center subs because that made the most sense). We are also mixing the stereo bass and the LFE channel together and sending it to 4 Buttkicker LFE's mounted under the couch with 1000 watts each. Technically there is 42,600 watts of power available if I could actually push it that hard.
Talking to Scott about where I wanted to go with the room from 2 subwoofers to 8 started out with custom designs. As I was already building new mains, I wasn't super enthusiastic about designing and building 8 new subwoofers too. Enter Kevin/John/Bill from GSG Audio Design. They had almost exactly what I was looking for and the design work was already done. Kevin spent more of his time than he probably should have talking to me and explaining some of the differences between the various models they offered. I did a little modeling on my own and decided that 4 Marty Cubes and 4 MBM cubes would cover my needs nicely. So I ordered a pallet of subwoofer kits. Two pallets actually.
When the shipment showed up I was immediately impressed with the care put into the packaging (extremely well done and strong). I dry fitted a couple of the cabinets to check fit and everything was flawlessly. I thought to myself, "this is going to be a lot easier than I thought it would be"...and it was. I had my friend Bill come over to the shop and we took a 3-day weekend and assembled all 8 cabinets without a hitch. I will say this...I did all of mine with clamps because I was planning on finishing them all (it wasn't until later I decided to do the center 4 black) and I didn't want nail holes. Pro-tip...if you are going to Duratex yours, just get a finish nailer and you could literally assemble one of these in an hour or two with minimal clamping. Let the glue dry, and bondo over the nail holes prior to painting, they are that easy to assemble. Everything is very well marked and the instructions are excellent. I do recommend printing the instructions so you have a reference next to you that you can spill glue on (not your laptop).
The transformation of this theater to stereo L/R subs separate from the LFE subs has been DRAMATIC! The 2-ch music is spectacular, the multi-ch music is spectacular, and movies are spectacular. No compromises (well, as few as possible anyway) The audio quality of the GSG subs is fantastic and actually required very little DSP work, especially the MBM cubes with the JBL 2269H drivers. The LFE cubes use the venerable Dayton RSS460HO drivers and they have solid output to under 15hz. I'm rolling mine off artificially above that and blending to the bass shakers just so I don't break my house. Seriously.
GSG Audio Design comes with the highest recommendation from me because of their product line, their customer service, their commitment to quality, and most of all their enthusiast attitude about all things audio. Thank you guys!
Dual MiniMarty by Chris F
I decided to go the DIY route because my mains are Klipsch La Scala’s, and so I needed subs that could keep up with output wise. I sent an email to GSG and got a quick and helpful response. I ordered 2 mini Marty's, the whole process was smooth and easy. The build process took two days and was very easy with the step by step instructions that can be found on the GSG site. If you take your time and have patience while the glue is drying, you’ll be happy because the eventual outcome will be an amazing sub!
I’m currently running two Mini Martys on a Behringer NX6000d with two Dayton Ultimax UM18’s and subs sound miles ahead of any other subwoofer I have ever heard. I'm now a believer in DIY and Marty subwoofer line-up!

Dual Devastators by Michael N.
I purchased a pair of GSG Audio 21” Devastator subwoofer flat packs from GSG Audio in early March 2020. They arrived within two weeks. The shipping company calls you to schedule a delivery to your residence. They arrived well packaged. I also purchased two 21” Eminence NSW6021-6 drivers also available from GSG Audio.
Before arrival I purchased 4, 36”, 4, 24”, and 2, 50” clamps. I already owned a variety of C clamps and smaller 8” vice-grip clamps. I read the instructions very carefully before the multi-stage gluing process. I used 3, 16 oz TiteBond 2 glue containers. The project was spread over the course of 12 days as I was also working my day job and mainly doing the gluing operations in the evening. I used NO brads so I had to wait until the glue was sufficiently set and hardened before proceeding. Note, even though this project is designed to be completed by one person it is necessary to have a second pair of hands to rotate the cabs when gluing, especially as it grows heavier.
I rounded all sides of the cabinets with a ¼” round over routing bit. I finished the sub cabinets with spray grade Duratex using an Avanti portable HVLP paint and stain sprayer. It is necessary to add approximately six ounces of water per quart. I applied two coats, hand sanding the finish with 120 and 220 sandpaper. The finish is very smooth and less textured than using a textured roller. For those that are concerned about being able to get deep into the recessed port areas I painted those first marking off with painters’ tape.
Onto the sound. I input the parametric equalizer and high-pass settings as recommended in the builder’s guide available on the GSG site, into my QSC PLD 4.5 amplifier. It is critical to set the high-pass filter at 19/20Hz as frequencies below this can easily damage any subwoofer. This design coupled with the Eminence drivers produces a very efficient subwoofer. I had to decrease the gain by more than 6dB. Even with those adjustments the subs play very loud particularly when playing 4K Blu-Ray movies using the new uncompressed Dolby Atmos sound tracks.
Overall impressions of the Devastators are impressive. They are very authoritative and provide near limitless headroom. Overall low and mid frequency bass response is outstanding. If you like working with your hands and have some wood-working experience this project is very rewarding.
Roundover Mini and a MBMs by Nathan R
I'm not one for doing great reviews but I must put in my 2 cents on these GSG Audio cabinets.
I watched the videos of people assembling these enclosures and I figured I could give it a shot (I had previous experience building sub boxes from back in the day, and it was never as easy as just gluing a box together). I read the directions a few times before I started the dry fit and to my surprise things were rather elementary. It was actually so easy I wondered if was doing something wrong, but the directions confirmed that I wasn’t.
The fitment of the edges and bracing were so precise it almost made it impossible to mess this up. I really wanted to take my time with this but I didn't have to. The sub cabinets went together in less than 3 days (could have been much less had I not had to work). I would glue a few pieces together and go off to work, then a few more when I got home. Rinse and repeat from there.
How you finish your cabinets is up to you, but I bought a low cost spray gun off amazon, got some primer from home depot and went to town. For the final paint coat I went to Sherwin-Williams and picked up some black cabinet paint.
Once the paint was done, I couldn't stand it any longer and needed to hear these. I was blown away of how crisp and low they sounded. I used a mini dsp and REW for the EQ process along with a Behringer NX6000 for the amplification.
Over all I am extremely pleased with the final result and plan on adding some additional subs in the future.
Dual Devastators by Mike M.
Before I say anything about the Devastators, as mentioned many times over on different forums and reviews on GSG’s Facebook page, AVSforum.com and website, these guys are fantastic to work with and make it very easy if you have questions, all the way from the ordering phase through final setup and calibration. Kevin, John and Bill will take the time needed to help a customer.
I’m not very handy to say the least but had learned a lot in recently building a dedicated theater room. I took the plunge for two Devastators and dug in. The build wasn’t too difficult and when I ran into an issue and had a question, Kevin was there to help.
I admit I was intimidated to build these as I worry a lot already and really didn’t want to mess something up and just have an expensive pile of MDF. But after getting these integrated into my theater all I can say is WOW!
Effortless, clean, impactful, scary, finesse are some of the words I’d use to describe them. If you take the time to set these up correctly with DSP you really can’t go wrong. The only con I know of is their size, but if you can fit them, then don’t look back!
Two Devastators by Jonathan P.
Integrating a pair of GSG Devastators in with existing GSG Mini-Marty’s.
I have what may be the world’s worst room for bass. It’s oddly shaped, very large, open, and on concrete, and it just seems to eat whatever bass I throw at it. I spent 10 years upgrading and re-upgrading commercial subs and nothing could keep up with my bass-sucking freak room. I have built a bunch of DIY speakers from scratch and found there’s parts I really enjoy, like assembly and finishing, and parts I absolutely hate, like endless cutting, sanding, bracing, and material removal. Enter GSG. They’re everything I like about sub building and nothing I don’t. The enclosures are expertly designed, the panels are cut to the millimeter, and everything from ports to bracing to driver cut-outs fits and functions flawlessly.
I started with some GSG Mini-Marty’s. The builds were easy and fun and the detailed instructions and parts checklist made putting them together absolutely idiot-proof (as this idiot can attest). I built four of them, powered them with a pair of NX6000d’s and placed them in my room. Holy Cow! The result was the thick, thunderous bass I was always chasing but could never achieve. Movies like Interstellar and War of the Worlds sounded like my house was going to blow up. And, at lower volumes, it was just full, satisfying bass.
Then I read about the Devastators. I thought about building a pair but the from-scratch build looked like a pain. Again, GSG to the rescue! Kevin and John said they’d integrate well with Mini-Marty’s, recommend some drivers, and shipped them out. The build was slightly more challenging than the Mini-Marty’s, but still something I’d consider pretty easy (maybe a 4 out of 10 on the difficulty scale?). I tried a few configurations in my room and found Marty’s in front and Devastators in back corners work best. The result? I’m blown away. Better, fuller, and more immediate than I’d ever dreamed of. I watched Aquaman with the GF and she said it felt more like a Disney ride than watching a movie. My friends come over and all say it’s like nothing they’ve ever heard, and better than any Imax or movie theater they’ve ever been to. And when they ask about the subs I love bragging that I built them myself.
What did I gain adding Devastators to existing Mini-Marty’s? There’s an added quality to the bass that is very noticeable, it’s more immediate and concussive. They also deliver a huge amount of headroom. I used to calibrate my subs using the red lights on the amps. Now there’s no such thing as red lights. I have as much bass as I can want and I never go beyond the second green light on an NX6000d. My AVR is on -5 and my amps are at 12:00 and I couldn’t imagine turning it up any more. All this headroom also gives me unlimited freedom to EQ my signal as much or as little as I want without fear of eating into my output.
There’s lots of build thread and advice on the GSG site so I won’t reiterate all that again, and instead I’ll share some observations:
As great as the GSG one-stop-shop is, the best thing about the experience may be John and Kevin. They are not only supremely knowledgeable, because they are friendly, responsive, and seem to genuinely enjoy this stuff (and were incredibly patient with my stupid questions). On my Mini-Marty’s, I lined two of them with denim insulation, and left the other two unlined. By measurement and by ear there is zero difference between them. Listen to the GSG instructions and don’t bother lining with insulation, it’s expensive, it’s a pain, and it makes no difference in performance at all. To give you an idea of the relative output of these subs, at my MLP one Devastator level matches pretty well with two Mini-Marty’s. GSG Devastators and Marty subs integrate perfectly with each other. They sum very well and have no destructive interference at port tune. If you’re considering mixing the two, go for it, the combination is awesome (like the best of both worlds, the UM18 in a Marty cabinet excels down low, and the Devastator excels everywhere else). Buy your drivers and amps here! There’s usually no additional shipping cost to simply add them on the pallet and they’re often able to offer great pricing in a package deal.
Mini-Marty's in Black by Giovanni F.
I can absolutely say that working with GSG audio has been one of the best experiences I have ever had with a company. Prior to making a purchase I worked with their team, who spent a significant amount of time with on the phone with me. They helped me get my home theater knowledge up to par, and discussed the pros and cons of a DIY subwoofer building, so that I could decide if it was right for me.
I actually first heard about GSG on YouTube, and that's when my research began. My system to prior to GSG, consisted of 2 large and much more expensive subs from a different but very well-known subwoofer company. Ultimately though, I could never get the type of output and low end I was looking for, so I ended up sending them back.
Back to GSG, They picked up the phone each and every time I had a complex or simple question, and always took their time explaining things in detail, but in a simple to understand way. I ended up going with 4 of their Mini-Marty cabs and Dayton Audio UM18’s and I couldn’t be any happier.
The output and extension I'm getting is impressive! My theater is also massive: 20”W x 32”L x 12”H and features 180” Elite screen, 4K Epson projector. The new GSG subs pressurize the room perfectly and effortlessly.
I highly recommend GSG and their subs/amps/drivers, and if you are going to make a purchase, just make sure to have plenty of glue and clamps ready, and you'll be all set as long as you just follow the assembly manual.
If you are on the fence, don't be....since their team will have your back, throughout the whole process from building all the way to setup and integration.
Dual Full Marty 21" by Kim P.
I recently completed a pair of Full Marty 21" boxes with the B&C 21" drivers. I've been on a journey of enjoyable DIY projects over the past 5-6 years. After a series of disappointing retail subs I built two Stereo Integrity 18" sealed subs and then added another pair a few months later. They were pretty capable units and enjoyed them for a few years.
Getting the upgrade itch I talked myself into a pair of Full Marty 21" boxes. The team at GSG was very helpful talking me through the ordering process and delivery went off without a hitch. Four of these boxes (ordered two extra for future use) are a handful but certainly doable. Unpacking and inventory show everything arrived and in perfect condition.
Assembly was a bit more complicated than my original 4 cu. ft. sealed boxes that housed my 18", but everything went together without a hitch. What I really liked about these boxes was how the seams were treated. A relief/channel was provided at the junctions of the box sides and top/bottom, which created a really clean look. A couple coats of Duratex and rewiring my room and they were placed into my system.
I always demo upgrades with my boys. Let's just say there were jaws dropping and grins grinning. New impact during movies and a more balanced bass for music put a smile on my face as well.
My only regret is not going for the Devastators but I just didn't think I had the room. After careful measurements though, I've got room for two Devastators with 2" to spare. So here we go again GSG! :)
Dual Devastators by Brad M.
I ordered 2 flat pack Devastator horns and while they were being shipped I read the instructions several times. I got all the supplies needed and to my surprise they arrived in a week and half (California to Alabama). I started working on them Wednesday night and finished them on Sunday morning. The cabinets went together so easily and the detailed instructions really made the build experience very enjoyable.
I’ve had the Devastator’s up and running now for 2 weeks. I’ve got everything dialed in using REW and my U-mik1. I was putting them through their paces listening to some electronic bass music and output was so loud and clean. I thought for sure I was maxing out my iNuke 6000 but to my surprise the second light was barely flickering (impressively meaning that my amps were only operating at about 50% of their capacity). The system had so much more to give but I was scared for my house and I can’t believe the difference in the tactile feel compared to my previous setup (ported enclosures with Eminence 21’s). Thanks so much for providing these. Every time I fire them up I’m so impressed and so I’m over here loving the new Devastator design.
If you want to see my cabinets in action, (click here for video).
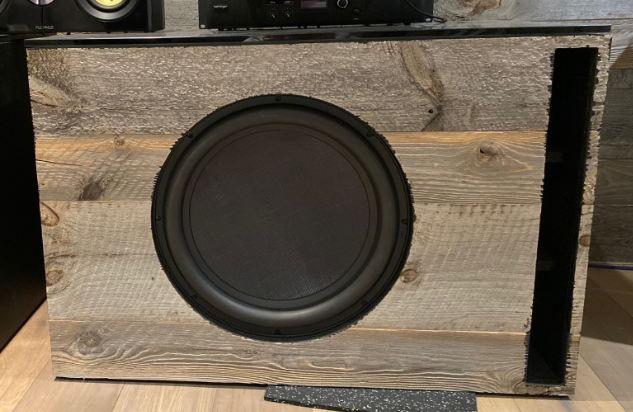
Mini Marty's in Barn Board and Black Glass by Stephen S.
The boxes are crazy loud...
Boxes went together amazing. I finished with black glass and barn board.
Mini Marty's with wood finish by Jeremy G.
I grew up close to my uncle, he was only 13 years older than I was and he was the coolest. He was funny, athletic, smart as all hell and he had really cool toys. Above all else, he loved his speakers. Some of my earliest memories were in his room, sitting between his huge 15 inch three way tower speakers, blurred vision, chattering teeth and loving every second of it. We ended up building some pretty awesome stereo speakers and sub woofers when I was a teenager but as I got older and out on my own, speakers became less and less important to me than they once were. Eventually my love affair with sound had seemed to have come to an end and over a decade had passed me by before I noticed that I didn't even own a pair of speakers.
A few years back after speaking with my wife, we agreed to purchase a name brand home theater set up. We set a budget and I was off! I decided on a 5.2 set up, it was pretty, it sounded good and I was happy.. for a while. To my wife's disappointment, I grew unsatisfied and I wanted more. First my front speakers weren't enough so, I upgraded them. Then my surrounds needed to be upgraded to match the towers. I needed a new receiver with a better DAC. Finally, of course I needed larger subs. I mean, who would be happy with two puny 12 inch subs?
It took me a few months to convince my wife that "we needed" new subs but eventually she gave in. If for nothing else just to shut me up. I eventually came across a video of a DIY builder assembling a speaker so big that even my uncle would be proud. This massive speaker had an 18" driver and the box and bracing looked sturdier than anything I had ever seen. I was so intrigued. I promised my wife that these wouldn't end up unfinished in her living room looking like a car sub woofer with felt carpeting on it. I convinced her that I could make these look so pretty that she "wouldn't even notice them". Despite my best efforts, I was wrong about that. You can't miss them. She did however admit that they turned out better than she had expected and she is very happy with them. Turns out that with a little extra patience and effort, you can make something mean look pretty good.
I won't go on and on about the performance but I will say that I am happy. Very Happy. These subs leave very little to be desired. I would highly recommend the GSG Audio products.
Above all I want to give a huge thank you to Kevin and the guys at GSG Audio. I'm probably not the easiest customer to deal with, I had a lot questions along the way. I would text or email Kevin and he was always prompt to get right back to me. In fact, most of the time he would call me directly and speak to me like we were old friends, it meant a lot. I'm in sales myself and the personal attention that Kevin provided really sold me. So, THANK YOU KEVIN AND GSG AUDIO!
Full Martys in Duratex by Colt A.
I have been in the home theater hobby for 10+ years and in that time I have never wanted to have a DIY sub setup. I felt as if it was not as good as name brand/internet direct companies. Then there was the matter of me not having any equipment to build anything. At that time, GSG Audio was not around. So, buying the equipment and material, and with my time invested, that would have potentially cost me just as much or more as a premade sub. With the internet direct subs, I started with their base model and over the years continually upgraded at additional cost. I always felt like I needed more. I was never happy until I bought their top of the line model at the time. Even then there were instances that I was wishing for more. With more movies having better sound and new video games that put an emphasis on surround sound and LFE, I needed more from my current subs. Newer models were being released that were an improvement, but the cost kept rising. It was much more than I was willing to spend.
A friend then suggested I look into GSG Audio. After going over their website, it made me realize that DIY doesn’t mean it’s difficult or expensive to do. Especially when dealing with GSG. The website answered every question that I could think of; from what is needed, how to build/install, and even how to set up applicable amps. All the major components could also be purchased off the website at the same time. All that, gave me the confidence to place an order and try DIY for the first time.
With me having zero experience with building anything speaker related, I was able to build the full marty boxes with zero issues. The instructions were precise and easy to understand along with the shopping list that is provided on the website. The numbered CNC pieces fit perfectly and the box went together easier that I could ever imagine. No special tools or equipment needed. The hardest part was waiting for the Duratex coating to try.
Once the build was complete and all instructions were followed on how to set up the amp, I demoed the dual full Martys. All doubt of DIY left my thoughts before the first demo scene ended. What I was met with is some of the most intense levels of bass that I have ever experienced. Explosions had impact now and the ultra low frequencies had more force in them. Headroom is also plentiful with the dual Martys, especially in comparison to my old subs where I had to run them hotter than normal to get the bass I was wanting. The Full Martys are in another league and my old internet direct subs can’t touch them.
Overall, GSG put together an awesome DIY package that is easy to do and has amazing results. The cost/performace can’t be beat and I will recommend them to all I know. I have no regrets and I plan on purchasing another pair of Full Martys from them in the future.
Dual Devastators by James S.
I built these last weekend (Aug. 10th-11th, 2019).
I think I could have easily been happy with one, but oh my lord they move so much air!
I've had to add felt pads to nearly everything in the theater room!
When they hit, it is like someone turned on a fan!
Dual Full Marty Subs in White by Jody F.
My journey into DIY home theater began in 2012. I had moved into a house with a huge living room. I owned a velodyne 12 inch sub that was on its way out so I replaced it with an SVS 12 inch cylinder sub thinking it would be amazing based on all of the reviews. After a few months the 12 inch just didn't cut it so I went back to the avsforum looking for a solution. I started reading the DIY forum and I was instantly hooked. I used to build boxes for my car when I was young so i figured I could build a home theater sub. I planned on one SI HT18 but decided two is better than one so I built my first two cabinets from baltic birch. They were 11cuft and tuned at 17hz. With my limited skills and lack of proper tools the fit and finish left a lot to be desired. They sounded good but would dance across the floor due to the lack of proper bracing. I did enjoy those for 7 years however.
Fast forward to May 2019 when I purchased my first home. My home decision was based partly on having a good area for home theater. I knew I didn't want to take on another scratch build but I did want something amazing. Back to the DIY forum and after little reading I find GSG.
Kevin was very helpful throughout the purchase and was always fast to answer questions. I placed the order and the pallet arrived at my house a week later. While unpacking I noticed all of the panels were clearly numbered which made the assembly easy and straight forward. I downloaded the instructions and dry fit all the panels on one to ensure proper fit. Then I went at it with the glue and in a couple of hours I had the first part all glued up.
I appreciated the thoughtfulness of the shopping list on the GSG site as well. I couldn't wait to power these beasts up so once all the connections were made and checked I powered up the amps and my Pioneer sc-lx701. The first thing I do when I hook up new subs is play my go to DJ Magic Mike feel the bass. This is my reference for deep bass. I pressed play and oh my god. This is the deepest, clearest bass I have ever heard and felt in my house. I could feel my nose and teeth tingle. These cabinets not only look amazing but they sound even better. Zero rattle and they aren't going to dance around anywhere.
I couldn't be happier with this build. I finally feel I have a professional home theater that far surpasses anything you could buy anywhere. There’s just nothing on the market that can compare to this DIY sub. I'm also glad to have met Kevin, John and Bill. It's rare that you can feel this good about a purchase from people who share the same passion as you and even rarer that something like this turns out exactly how you envisioned it.
Mini-Marty Subs (TBW-100 Drivers) by Brian D.
The new subs are doing great, and we had our first good extended session with them on Saturday night. I ran the two Mini's at 8 Ohms and broke out my Omnimic and ran some simple sweeps between 10-150hz, and have a surprisingly flat in-room response. I have them crossed over at 100Hz with my Chase PRO-10's. Music with these B&C drivers is taking some getting used to!
The best way I can explain it is with my older Chase Audio subs, you get the bass, but it's muddy, maybe a little boomy in some areas.
The B&C drivers have a unique way of articulating the actual sounds creating the bass to the point you can hear a surprising amount of detail -- something that I've never heard before in any of my sub's!
I have to assume this is the B&C driver, and not the cabinet, but the cabinets certainly do produce far more mid-bass punch than I expected. I'm really very impressed! I will also say that running all 4 cabs parallel at 4 ohms was pretty amazing, and it felt and sounded like a huge improvement over the entire low-end spectrum!
A huge thanks to the GSG team for the time, support and subwoofers that you are providing!
Quad Mini-Marty Subs by Justin C.
I've been in the home theater world for the past 10 years but of late, have just realized there was a DIY side of things. I've been a member of a few groups online and kept noticing the term "Mini" & "Full" Marty all over the place. After doing some research and looking at what I was currently running (2 Klipsch SW-115's), I made the leap to order 4 Mini-Marty's.
After hitting submit on the order, I soon realized how well Kevin and John are running things in CA. Not saying they do this for all orders, but I received a call from Kevin updating me on the status of my order and when it was expected to arrive. He was completely transparent and most companies today don't add the extra touch and they did. Next, I received the pallet with the pre-cut wood and this was the next tail tail sign that they take a lot of pride in what they do. The pallet was perfectly wrapped with tons of filler and even if the shipping company tried to destroy the pallet, they would have been unsuccessful.
Now it was time to build these beasts. After mocking up one speaker before applying the glue, it was downhill from here. I used the recommended glue and had no complications.
Once this was complete it was time to paint them. This is the part where you have free range on what/how you do this. I reached out to Kevin once again and got some pointers on what to do and with a little practice, it was a breeze. You still have to take your time on this part but the end result is AMAZING.
In the end I couldn't be happier with the product and the service GSG Audio provides. If your looking for the next step in home theater bass, you have found the right place. With a little elbow grease and some paint, you are on your way to taking your theater to the next level.
Justin
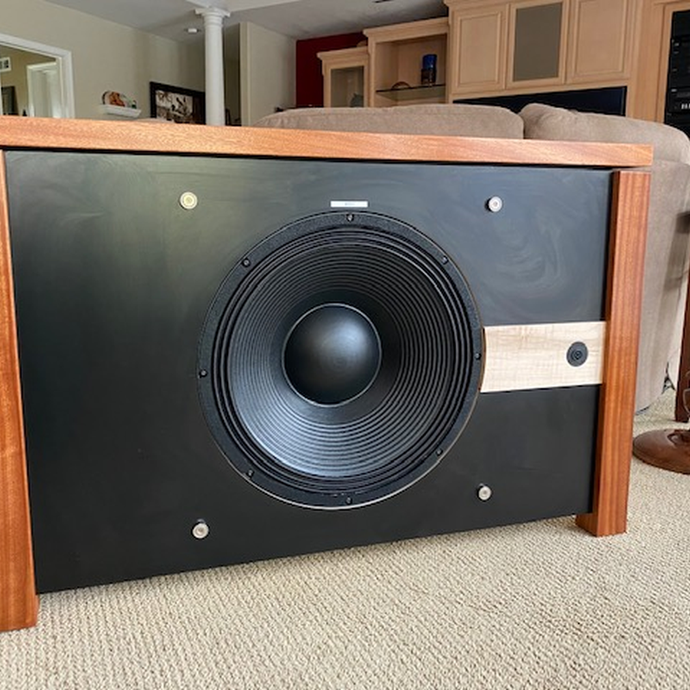
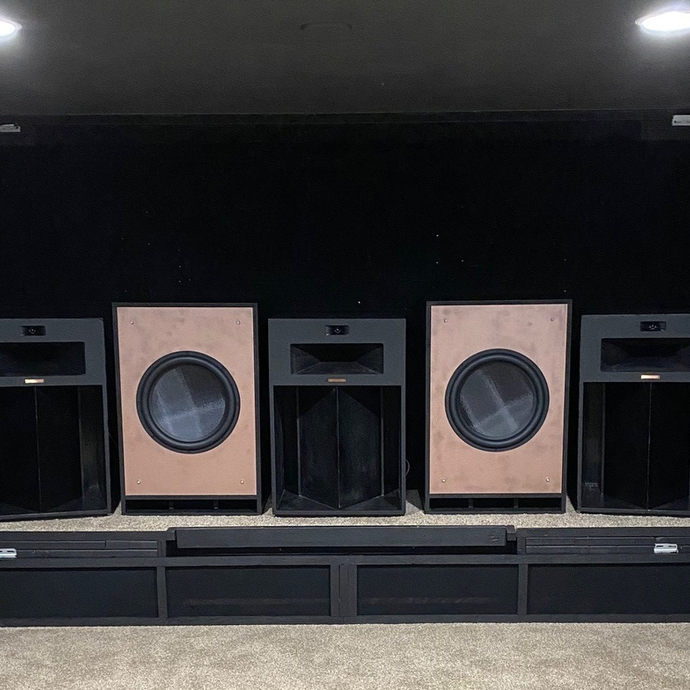
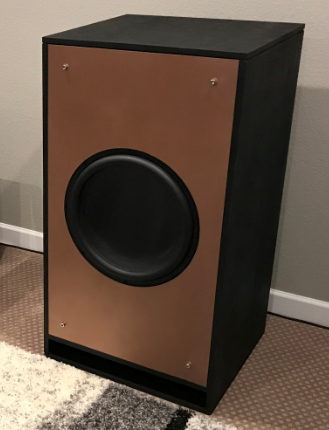
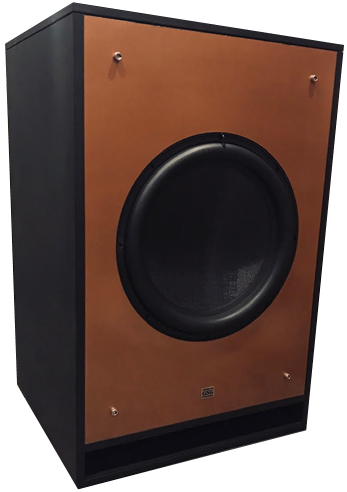
Full Marty w/ Copper Baffle by Jiles M.
Jiles did a fantastic job with his Full Marty Subs.
Check out his Amazing Build Documentary on YouTube.
I had always wanted to build a decent ‘entertainment’ room but I’d never really had the space to make the attempt. Fortune smiled on me in early 2018 when we decided to pull the trigger on finishing our basement. We would be able to squeeze two rooms and a bathroom out of the small space and my wife graciously ceded to me a 14x14 room with no external windows, a closet, and a nook for an AV cabinet. IT WAS ON.
Budget was extremely tight, so I cobbled together the equipment I owned and started scouring Craigslist and Facebook marketplace for the missing pieces. I managed to sort out a Definitive Technology 7.0.4 system with a Denon 4400X at its core. The missing piece though was something to reproduce the bass my DT BP2000s couldn’t.
Commercial subwoofers seemed to fall into two categories: Affordable anemic units… or monstrous units that simply cost far too much. Obviously, I wanted to implement a compelling subwoofer environment so I started searching for alternatives. I looked as SVS, Hsu, PSB, etc but nothing that I wanted fit my budget. And then serendipity struck.
While looking over the DIY forums at AVS I noted a post about a start up in California by the name of GSG Audio Design. They had made my dream a reality: precision cut, DIY subwoofer enclosures at a reasonable price. I went through the process of finding a “subwoofer buddy” to share shipping coasts and soon I was learning the joys of wood glue, paint, and sandpaper.
I am far from being “handy” or good with tools but I was able to assemble a full marty with relative ease. And the results were what I had hoped: an affordable subwoofer that looks impressive… and more importantly sounds impressive. I give the GSG line two thumbs up and I look forward to the next steps in my home theater journey. I bet a couple of MBMs would really work well with two full martys… and time will tell!
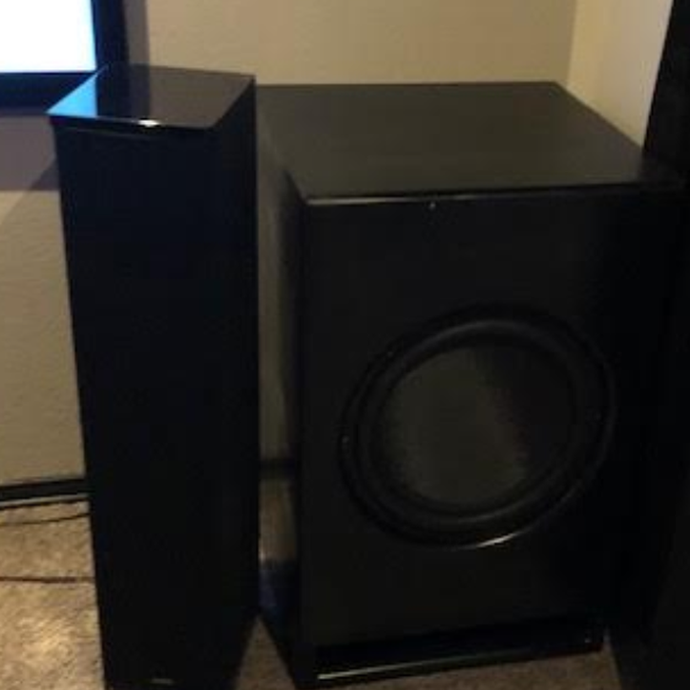
Mini-Marty in Flat Black by Brian S.
Brian shares his experience in How to Build Your Own Monster Subwoofer on YouTube.
Huge shout out to Kevin and John at GSG Audio Design! I’ve been subwoofer shopping for the past year and weighing all my options. DIY has always been something I’ve wanted to try with hearing about their price/performance ratio but was always too nervous with not having wood working skills or tools so it always just fell off the radar.
Then GSGAD came along and changed the game! Believe me when I say, John and Kevin make this as absolutely easy as possible for beginners like me. From the incredibly detailed build instructions, perfectly engineered and cut boxes to assemble to the listing of parts needed for your build. Not to mention the second to none customer service, they are always available to help guide you along, every step of the way.
Starting the build, a quick dry fit run of the box immediately gave me all the confidence in the world with how simple the build would be. Letting the glue and paint dry is honestly the longest part of the entire process and you could definitely have these built start to finish in a weekend if you had the drive to do so.
So far, I just have one of my two built and running and the performance is astonishing! I expected big things from the large ported 18 inch monster but my movies and games are on a whole new level now! I’ve ran plenty of sub arrangements in the past, dual 10’s, dual 12’s, a 15 and this easily walks circles around anything I’ve ever owned... and that’s just with one running!
If you’ve been on the fence, do yourself a favor and just go for it! For less than it costs to run a single 12-15 inch from some of the big name brands out there, you can have a pair of 18 inch tanks shaking the foundation of your house!
Marty Cubes in Gloss Black and Copper by Phillip R.
Very impressed with GSG flat pack kits. Shipping was quick and packaging was well done. Their quality in these precut panels is outstanding, and makes for a precision and tight fit. The use of numbered panels and easy to understand instructions makes it possible for anyone to build. As for the performance, WOW blew me away! They shovel way low into bass, and it’s truly a house shaking sub!
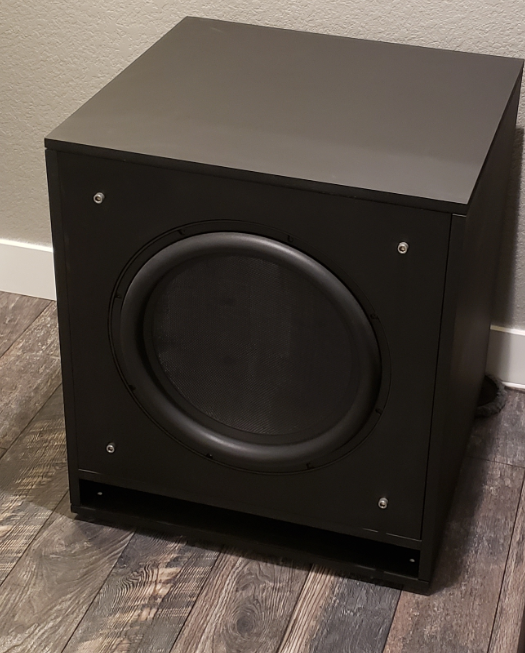
Marty Cubes in Charcoal Gray by Mike P.
Mike's story is coming soon...
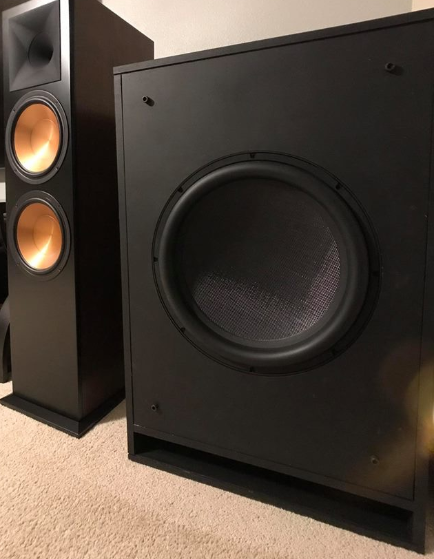
GSG Prototype - Flat Black w/Copper Baffle
This was one of the first MartySubs that we created. It is finished with a flat black shell, a copper painted baffle, and stainless steel hardware. The driver is a Dayton UM-18.
As folks build their MartySubs, we will be featuring many of them here, so stay tuned!